If you follow us on our social media sites, you may have seen that the dreaded sick bug has hit our home this week. Freckled Face number 2 came down with it Sunday morning, number 3 joined her early hours Wednesday morning and number 4 joined them early this morning! Fun and games! Freckled Face number 1 is still right as rain….fingers crossed he stays that way!
With Freckled Face number 2 feeling a bit better today, she wanted to do something a bit more fun than just lay on the couch and watch films or read. She still hasn’t got a lot of energy and strength though, so I thought we would keep it simple. I took a look in our arts and crafts box to see what we had. Supplies are pretty low! I need to restock! I gave her a few ideas and she settled on a dream catcher. We thought we’d share with you how we made it!
You will need

What to do
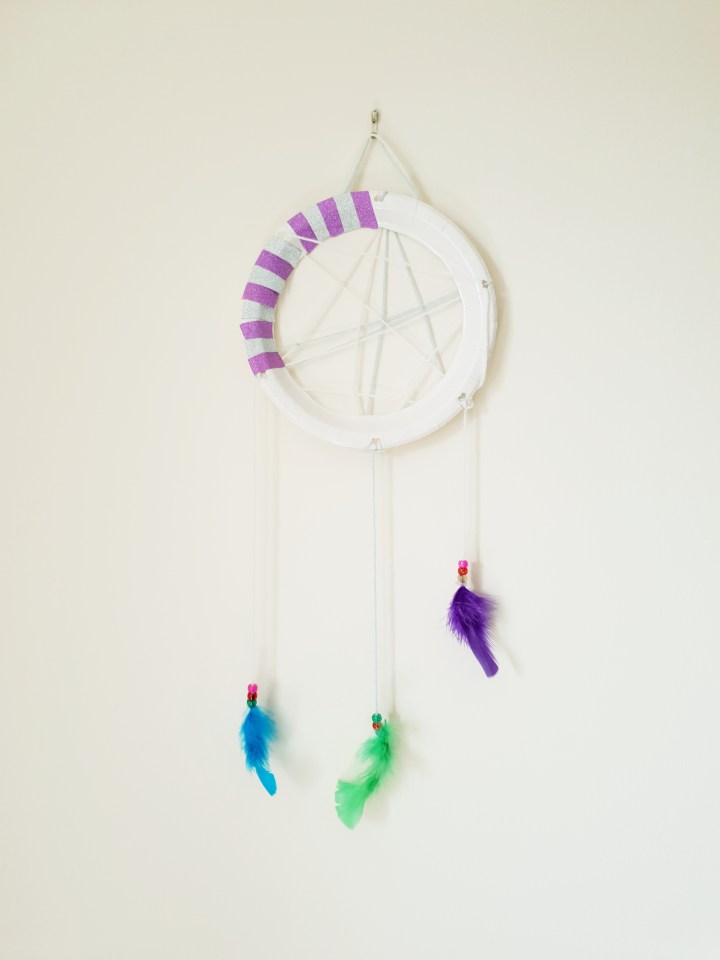
1. Cut the middle of the paper plate out, just leaving the rim.
2. Using the hole punch, put holes around the edge every 4 inches or so (depending on the size of your plate).
3. Cut the wool. We cut ours about the length of one of my arms. (We did a second colour and cut that one a bit smaller).
4. The an end of the wool through one of the holes.
5. Thread it through the other holes in a random order and tie it off when finished. (Optional: you can add a few beads at this point)

6. Decorate the rest of the paper plate with the coloured tape, however you wish! (You can also add gems if you want. We didn’t have any!)

7. Cut 3 more pieces of wool to hang from the plate. You can choose how long you want each one. Don’t forget you’ll be tying the to a feather and the plate, so allow a little extra length for that.
8. Take one piece of wool and tie one end to one of the feathers. (A double knot is best)
9. Thread however many beads on the piece of wool. (We did 3 on each)

*REPEAT 8 AND 9 UNTIL ALL 3 ARE COMPLETED*
10. Attach the hanging wool threads to the paper plate. We tied ours through the three bottoms holes, but you can tape/glue them to the back of the paper late of you want to.
Da dah! You have a Dream Catcher!
Freckled Face number 2 really enjoyed doing it and is happy with what she did.
We would love to hear from you if you try it! Comment below!

My youngest is going to love this. Craft is her life !!!
LikeLiked by 1 person
Ah I hope she does! We love a bit of craftiness here!
LikeLike
Ohh this looks fun and so easy we shall have to give it a go ☺
LikeLiked by 1 person
It was so easy! I cut out the middle of the plate, then she did all the rest! Let us know how you get on! 🙂
LikeLike
I will do thanks for sharing ☺
LikeLiked by 1 person
Oh these look so simple and easy to do. A summer craft!
LikeLiked by 1 person